Do you find the subject of natural dyeing fascinating – but also a little strange and mysterious?
Unlike the neat little sachets of Dylon they seem to hold a strange alchemy requiring specialist knowledge that can only be gained through years of experimentation. Not for the likes of us dye dabblers.
I always imagined natural dyeing techniques would entail long walks in the country gathering baskets full of seasonal flowers, berries and other natural dye plants that I would have no means of identifying, followed by careful weighing and preparation of strange archaic substances, and perhaps even the wave of a mystic wand.
Why would anyone in the 21st century even want to boil up handfuls of grubby vegetables just to dye a few grams of wool a rather grubby shade of beige?
I guess the answer is- the magnetic and irresistible power of curiosity. It’s that voice in your head that begins every sentence with;
“I wonder what would happen if….”
and ends it with;
” no, I can’t package it, sell it, affiliate market it or drop ship it. I just want to do it!”
So as someone prone to curiosity, and with a desire to explore new territory, in September I rather recklessly announced to one of my textile classes that we would be doing a natural dye project this term. And no, I’ve never done it before.
So in this blog post I’ll give you a little insight into how it is possible to create a palette of the most beautiful coloured yarns using simple ‘kitchen sink’ methods – and a class of curious minds.
We worked with plant materials that were easy to find. Some came from our gardens, and kitchens; some came from the supermarket, and the woad was bought online. But none of it was difficult to find.
We had no recipe book, just a vague idea of what we thought might happen.
I should probably also say that, for me, one of the joys of this project was the delight of discovery and the freedom of exploration. The colours achieved are non repeatable, I can’t predict how colour fast they’ll be and I can’t really explain the chemistry involved.
I can, however, tell you that the process was intriguing, the colours are beautiful and the stories we uncovered about the history of natural dyes were surprising and compelling.
For me the subject of ‘textiles’ has always been the subject of ‘everything’; history, geography, science, art – textiles can be used as the vehicle for navigating a route through all of these things, and the history of natural dyes has much to tell us about….well, pretty much everything.
So this is what we did – and what we learnt along the way.
1. MORDANTING
We started with around 500gms of undyed aran weight wool which we wound into small skeins of about 10gms each.
We washed the skeins in warm soapy water and rinsed them well.
We used Alum (which we bought online) and cream of tartar (which we bought in the supermarket) to mordant the wool. Mordanting ensures the dye fixes to the fibres.
We allowed 1tsp of allum and 1tsp of cream of tartar for every 100gms of yarn.
Remember, this is my ‘suck it and see’ recipe!
Because we only had large kitchen saucepans to work with we decided to split up into 4 groups at this point. Each group dissolved 3-4 teaspoons of alum, and cream of tartar, in a cup of hot water then added this to a pan containing enough water to cover the skeins and stirred well to make sure everything was completely dissolved.
Then we added the wet wool to the pan – each group added 12 or 13 skeins. We brought this to simmering and continued to simmer for about an hour. Then we turn off the heat and left it over night.
The next day we were ready to dye. We didn’t rinse the mordanted skeins……and what was left of the mordant bath was disposed of in the sink with lots of running water
2. PH LEVELS AND A LITTLE BIT OF SCIENCE
The PH level of the dye bath affects the colour of the dye so we experimented with adjusting these levels using vinegar and citric acid to make the dyes more acidic, and washing soda to make the dyes more alkaline. We used litmus papers to test the PH levels and found that generally 1 or 2 teaspoons was enough to significantly change the levels – but also, too much of either additive had a detrimental effect on the handle of the wool.
For each plant material that we used, we made up a neutral dyebath, an acidic bath and an alkaline bath; aiming to achieve three different colour variations from one natural dye source.
3. MAKING THE VEGETABLE DYE BATHS
We were very kindly donated a huge bag of yellow onion skins and we used these to make our first dyes as I had read that this is the easiest plant material to work with and usually give excellent results.
Working in 3 groups we each filled a pan about one third full of onion skins (no weighing or measuring for us!), filled it about two thirds full of cold water and heated it to boiling point.
We added citric acid to one pan and washing soda to another – the third remained neutral. We let it simmer for about an hour then took it off the heat and left it over night.
The next day the dye baths were strained/sieved to remove the plant material.
This is pretty much what we did to prepare all the natural dyebaths, – we just filled the pans one third full with plant material – chopped up if we thought it necessary.
Relying on kind donations by teachers and parents, and whatever the students brought in with them that particular day we experimented with a good range of plant and vegetable dyes including……
Yellow onion skin, elderberry, blackberry, sloeberry, plum, red cabbage, horsetail, dahlia.
4. DYEING THE WOOL
We added 2 or 3 skeins of wet mordanted wool to each dye bath and brought the temperature up to boiling then allowed the dyebath to simmer for around 40 minutes, gently stirring occasionally, then took it off the heat and left it overnight.
The next day the skeins were removed from the dyebath and rinsed thoroughly. (you could wash the wool at this stage -but we didn’t)
This was the most exciting bit; examining the final results. Did they measure up to our expectations? Were they disappointing? Were they surprising? Did we like the colour? How did the dye bath effect the handle of the wool?
We came to the conclusion that the more acidic dyebaths yielded pinker/redder tones and the more alkaline the dyebath the more the colour inched towards green.
We also discovered that if you tip about 10 teaspoons of washing soda into a dye bath when instructed to add just one – the result is a nasty weak and scratchy yarn!
So that’s it really – we did this with all the plant materials we collected and achieved the most beautiful collection of colours. Some were surprising; the dahlia flowers produced the most vibrant shade of yellow – a lovely brilliant sunshiny colour. The red cabbage yielded a pretty pink, a lilac and a sage green and the berries all gave up subtle variations on beige and pinky brown
DYEING WITH WOAD
I decided to buy in the woad as I was keen for everyone to experience the magical oxidising process – where the materials change from murky yellow to brilliant blue as they make contact with the oxygen in the air – and I didn’t want to disappoint by using a less ‘tried and tested’ source of woad. I bought ours from here, it came with excellent instructions on how to use it and it didn’t disappoint!
It was easy to use and really did produce the most intense indigo blues that added a depth and richness to our natural dye colour palette.
THE COLOUR STORIES
Throughout the dye process we also learnt about how the history of natural dyes illuminates our history books with stories that date back to Greek legend and span the breadth of the globe.
We learnt why purple was such a coveted colour. None of our experiments produced strong purple shades and historically this was the most difficult colour to achieve.
For centuries, until the discovery of the first synthetic dye the mucus of a particular Mediterranean sea snail yielded the best bright and colour fast purple dye. But it took 10 000 snails to yield just 1 gram of dyestuff and it was so expensive only the very rich and powerful could afford to wear it. We imagined Cleopatra’s ships with their brilliant purple sails billowing in the wind, and Julius Caesar returning to Rome wearing a vivid violet toga.
Throughout history purple has signified extreme wealth and power. It’s been such a provocative colour that wearing it could even be viewed as high treason with the penalty of death.
We learnt that in Britain, before the introduction of synthetic dyes, our 3 staple dyestuffs were Weld (yellow) Woad (blue) and Madder (red) and these three colours were mixed and overdyed to create a whole spectrum of colours.
Weld is said to produce the most brilliant yellow – and when over dyed with woad it creates the brightest forest green; the green apparently worn by Robin Hood and his Merry Men. This colour was known as Lincoln Green and it has been immortalised through hundreds of story books and films over the years.
We learnt about woad; our native ‘indigo’ dye which was used by Ancient Britons not only to dye textiles, but to dye whole bodies in preparation for war with the invading Romans. Imagining the fear and confusion ignited by an army of blue Celtic Iceni led by a woman with flaming red hair, we also discovered that the Celts knew a bit about medicine too as woad has natural astringent properties so it served two purposes as they marched in to battle.
Madder was the dye we didn’t get to try – so we are missing a good red from our colour palette. But we did lean that, strictly speaking, the colour yielded by madder is more orange than a true red but the concept – and consequently the word, orange didn’t exist in Britain until the introduction of oranges (the fruit). So it seems that a colour can’t exist in our consciousness until it has been named.
THE COLLABORATIVE CROCHET PROJECT
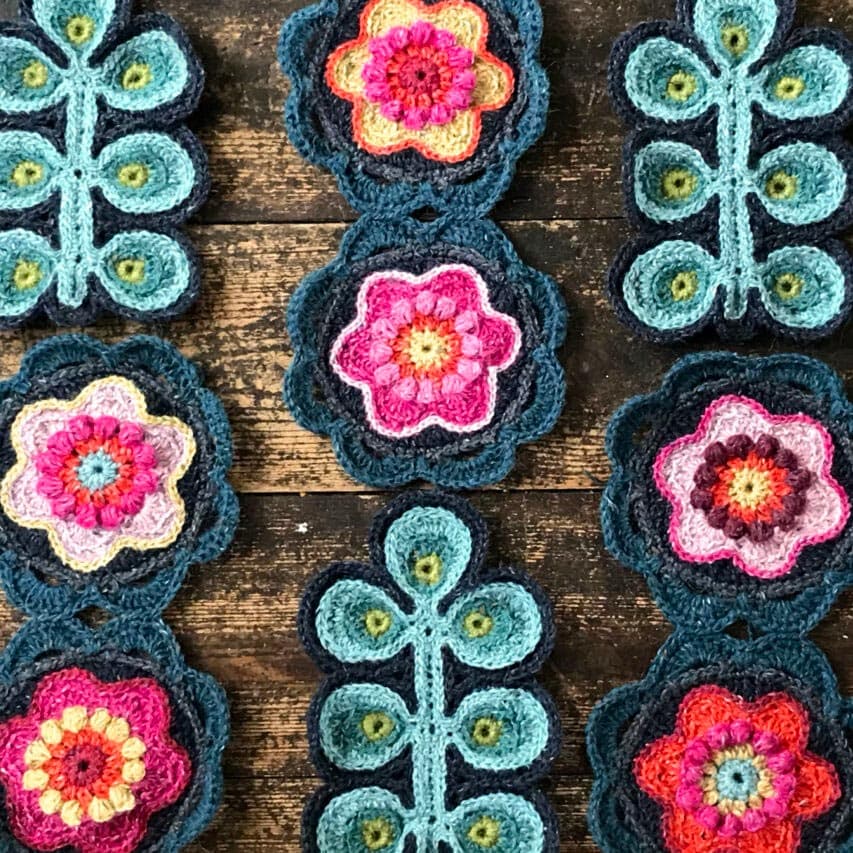
So , after several days of dyeing, and story telling, we had a collection of unique, unrepeatable, extremely beautiful coloured yarns to work with and we started to make our granny squares. I had already decided that a crochet afghan blanket would be the perfect way to use all those small skeins of coloured yarn.
I love collaborative projects. I love that everyone, whatever their skills or commitment level, is able to contribute what they can. Every small piece represents an individual and the finished work represents the group.
Some of the ‘squares’ were less than square – and required a little ‘help’ to straighten then up. Some were very large, some were a little holey, some were perfectly executed- but they were all inherently charming and I took them home over Christmas to finish piecing them together.

This is the finished blanket, it’s been trimmed, blocked and pressed – and I love it!
At first glance it looks like any other conventional crochet granny square blanket, but it is so much more than that. It is a window into the past and a brilliant reminder of the colours our ancestors experienced.

This blanket is a collection of stories about our past told in full Technicolour and a testament to the collective curious mind.